

15 Jul Restoration of two broken incisors Unica Proximal – Dr Monaldo Saracinelli
Restoration of two broken incisors – Unica Proximal
by Dr. Monaldo Saracinelli

Dr. Monaldo Saracinelli
Dr. Saracinelli is a highly experienced dental professional with a degree in Dentistry (with Laude) from the University of Siena (1985).
Has held multiple academic and teaching roles, including Student Trainer in Conservative Dentistry and Lecturer in Endodontics and Restorative Dentistry at the University of Siena.
Taught masticatory biomechanics, applied prosthetics, and odontostomatology in both technical secondary education and university-level nursing programs.
International academic experience includes lecturing roles at universities in France (Marseille and Montpellier) and Egypt (Pharos University, Alexandria).
Served as Visiting Professor at the University of Padua in postgraduate pediatric dentistry and early orthodontic treatments.
Author or co-author of several scientific publications and frequent lecturer at national and international congresses and courses, Dr. Saracinelli is an active member of StyleItaliano Group and currently maintains a private dental practice in Grosseto.
clinical case
The patient came to our attention due to a fracture of the two upper incisors 1.1 and 2.1 caused by trauma.
An initial radiological examination confirmed that the trauma did not extend to the root area of the tooth; we therefore decided to proceed with the restoration of the missing parts of the incisors using a direct composite technique.
The following case study shows the step-by-step direct restoration procedure using the Polydentia Unica proximal anterior matrix.
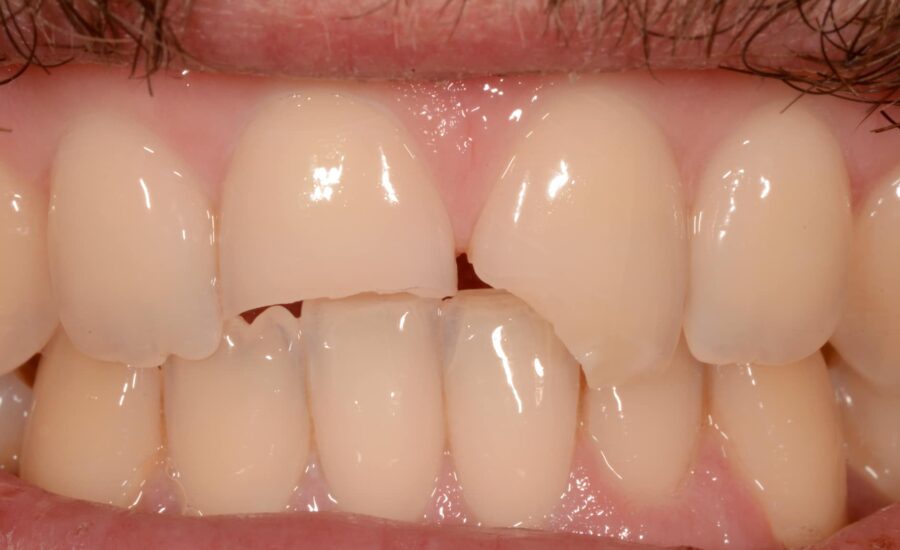
1: Pre-operative view evidencing the fractured incisors (1).
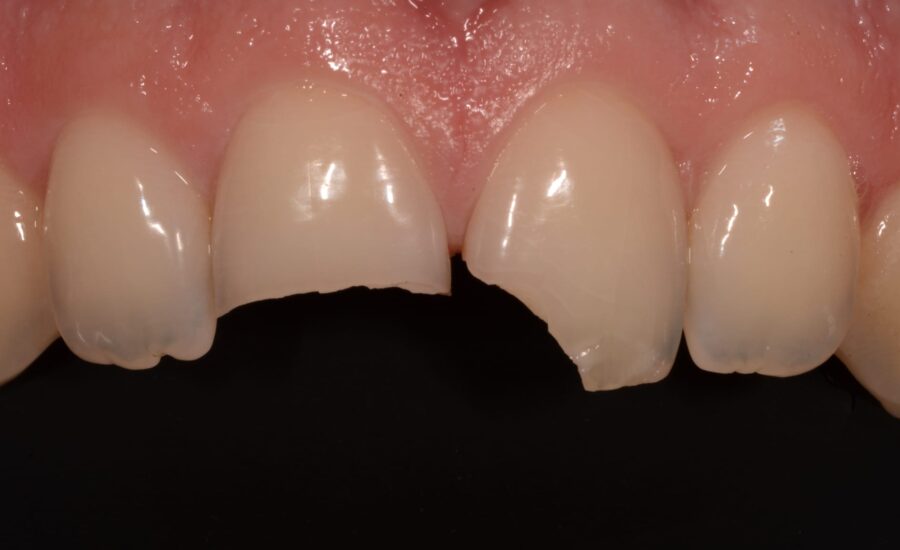
2: Pre-operative view evidencing the fractured incisors (2).
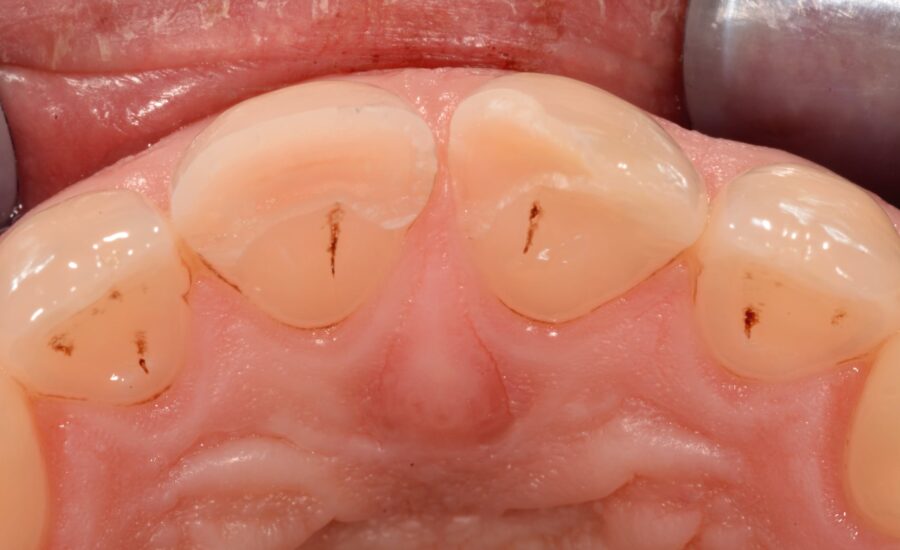
3: The trauma does not affect the roots, and the teeth respond normally to vitality tests.
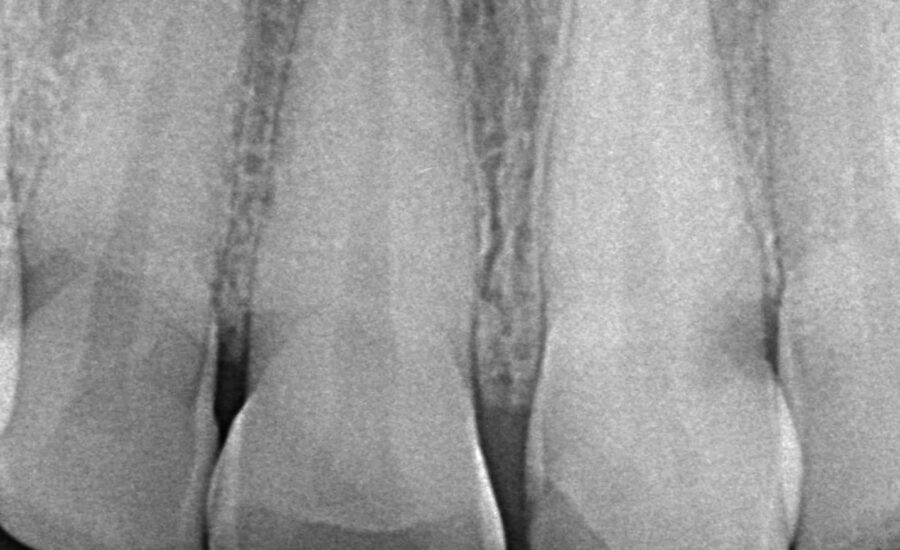
4: The preoperative X-Ray view confirmed that the trauma did not extend to the root.
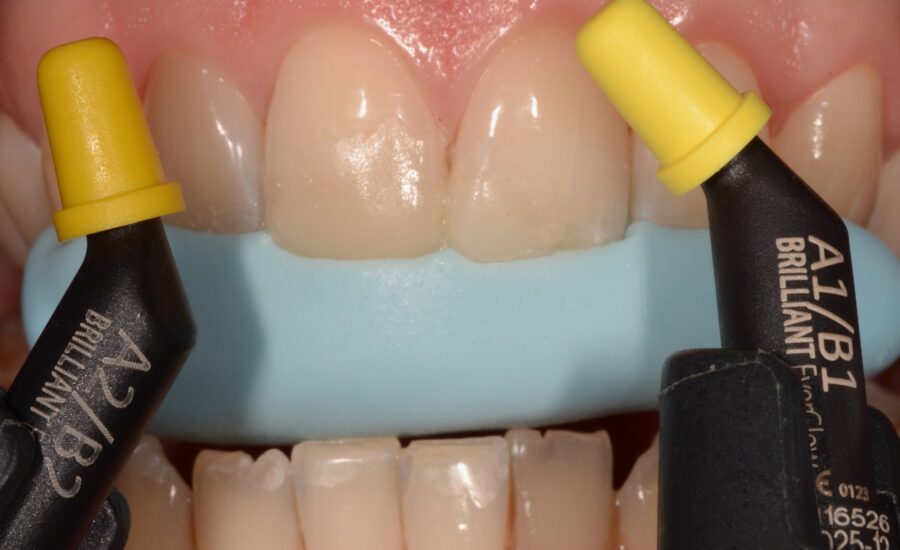
5: The first step in achieving a successful aesthetic restoration is determining the correct shape and shade of the composite material. First, a mock-up was created to verify the shape of the restoration according to its function, as well as the most appropriate shade of composite. After functional testing, a silicone stent was created based on the mock up.
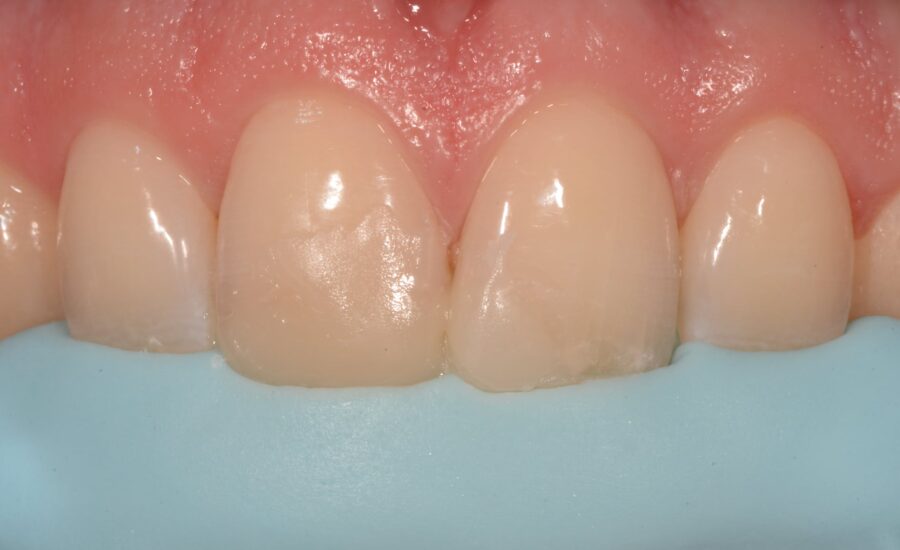
6: Copy of the mock up.
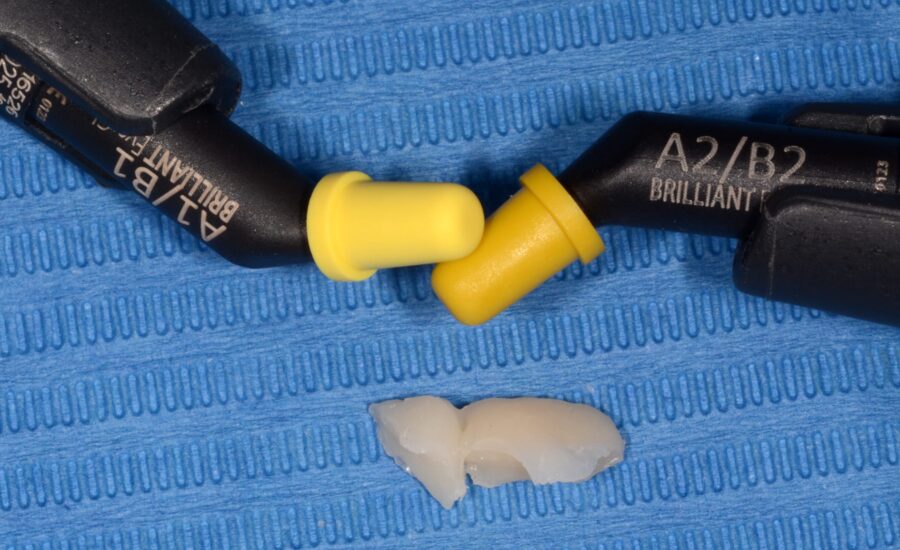
7: A close comparison of the two shade of composite. Material choice was done according to the natural color of the teeth.
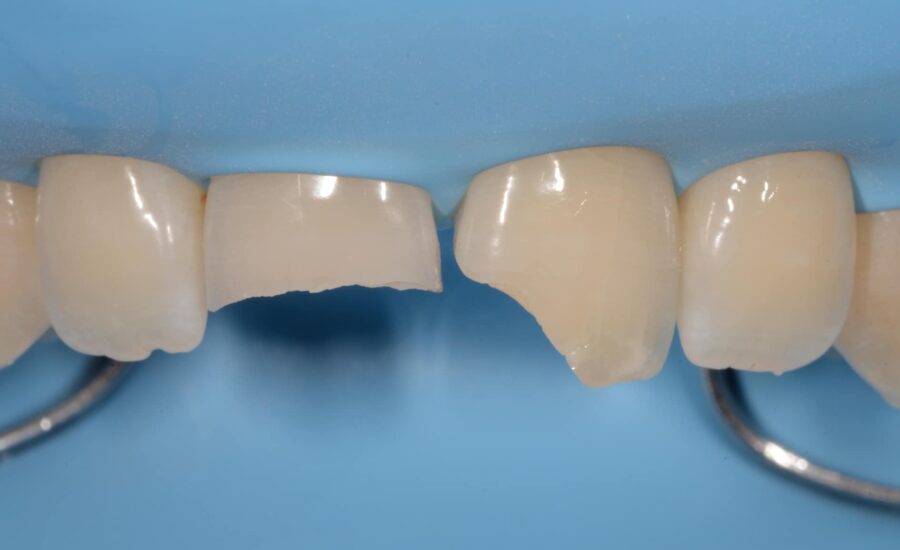
8: Pre-operative situation under rubber dam isolation.
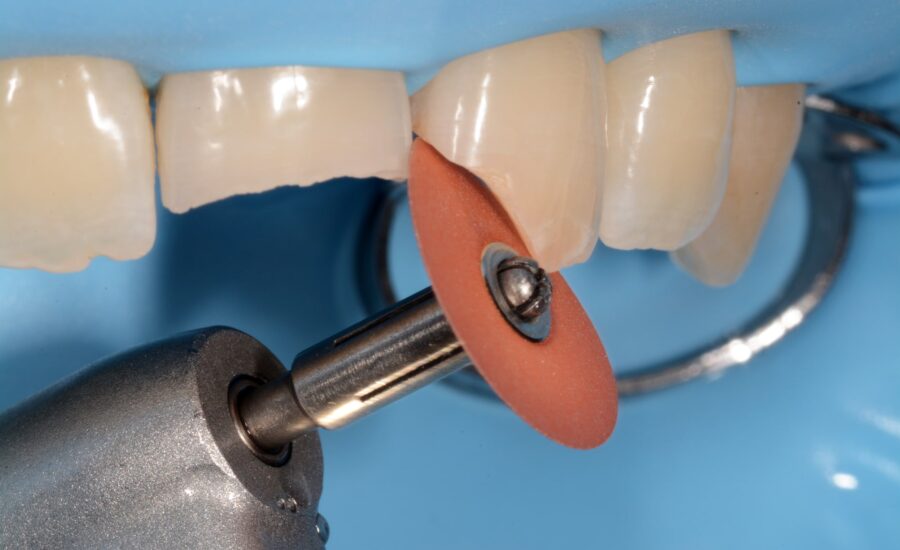
9: Accurate margin condition is an essential requirement to obtain strong composite adhesion: smoothing of the rough palatal surfaces using a middle grit abrasive disk.
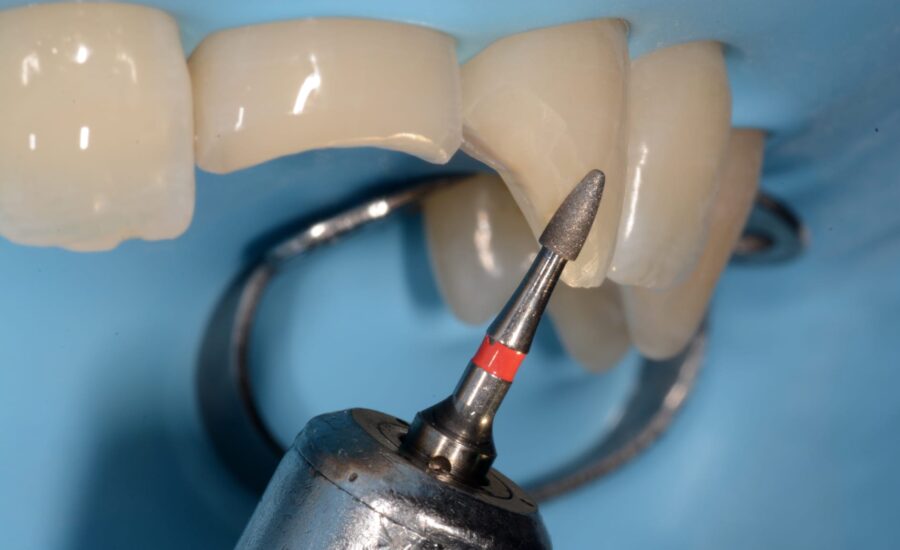
10: Smoothing and preparation of the labial surfaces with a long chamfer (45°) between enamel and dentin.
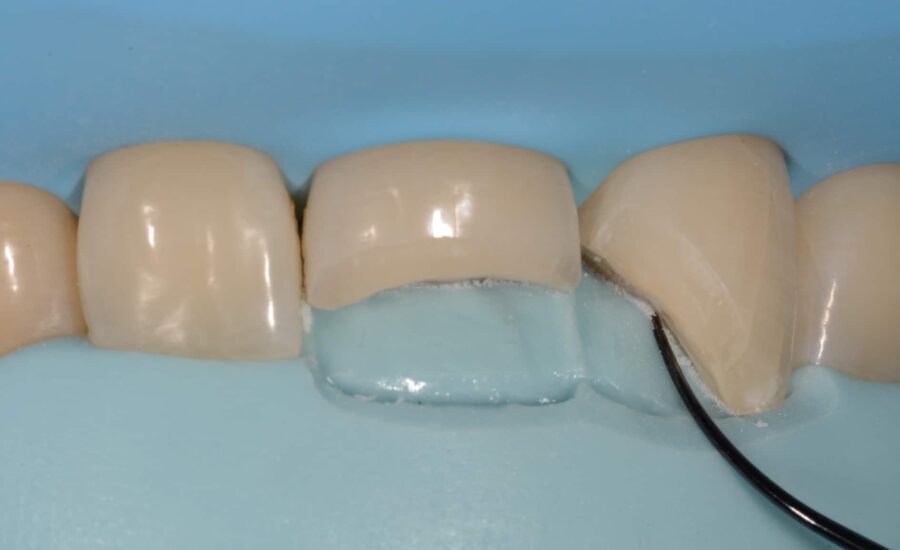
11: Marking the limit of the palatal margin with a thin sharp instrument on the silicone key which will serve as a reference point for subsequent restoration steps.
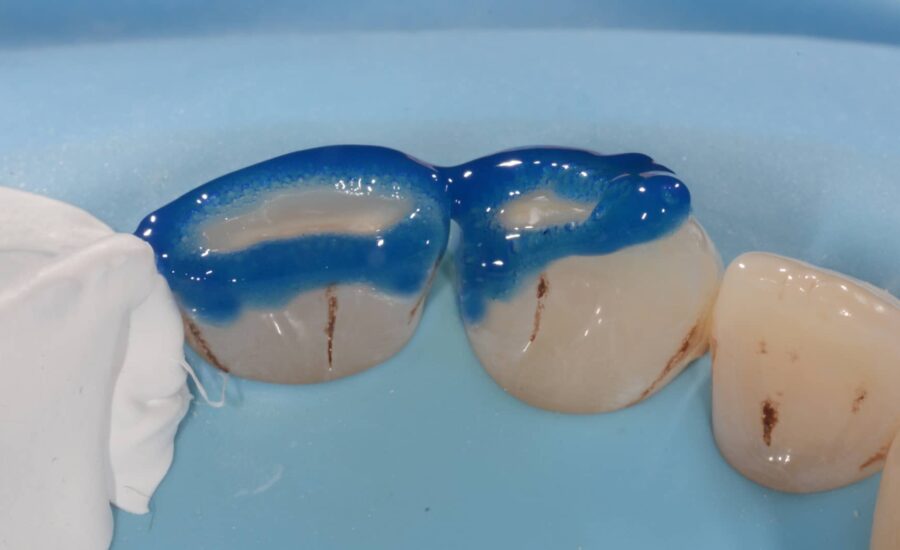
12: Etching procedure using 37% Orthophosphoric acid for 30sec.
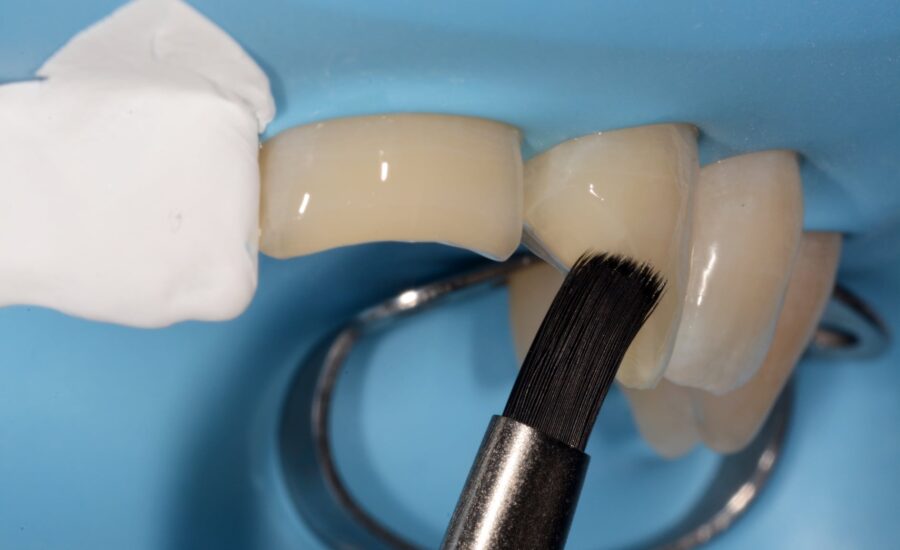
13: Bonding application; many layers of adhesive were applied using a brush to obtain an uniform coverage of the fractured surfaces .
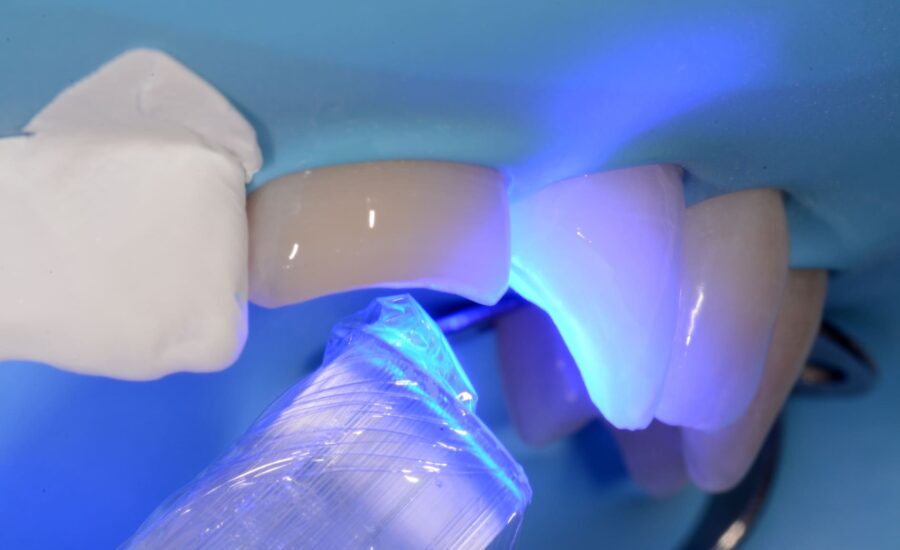
14: Light curing of the bonding for 40 sec.
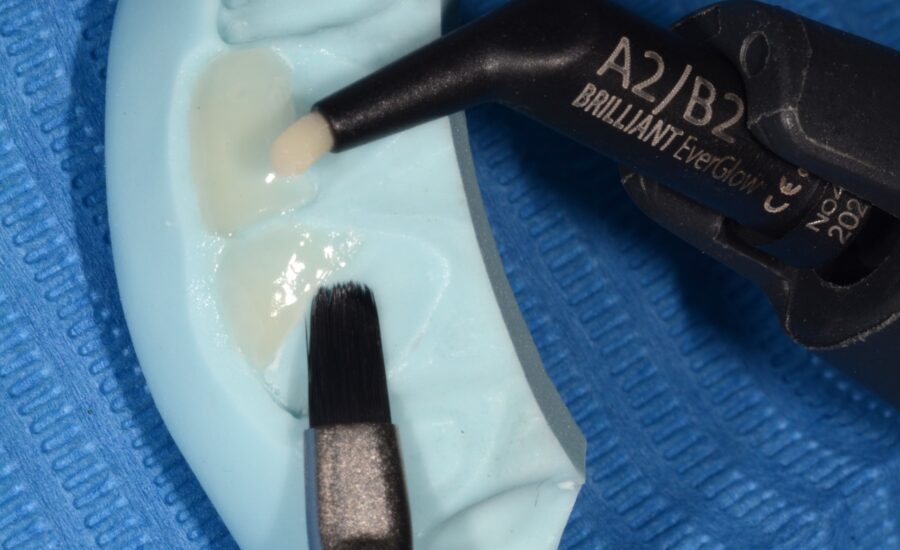
15: A2 / B2 composite shade was chosen for this restoration; a first layer was applied directly to the silicone key and will be used to create the palatal shells.
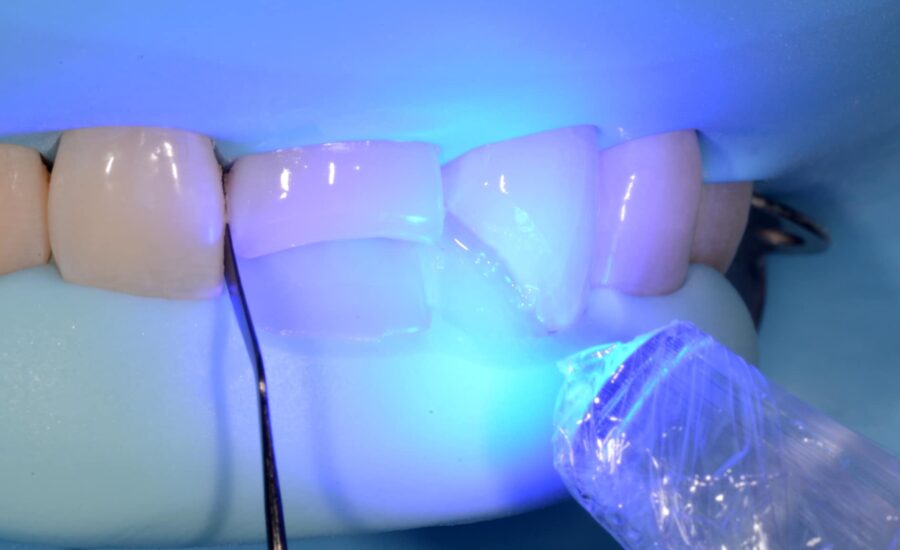
16: The palatal shells were light-cured. A spatula was used to separate tooth 12, leaving the necessary space for the matrix.
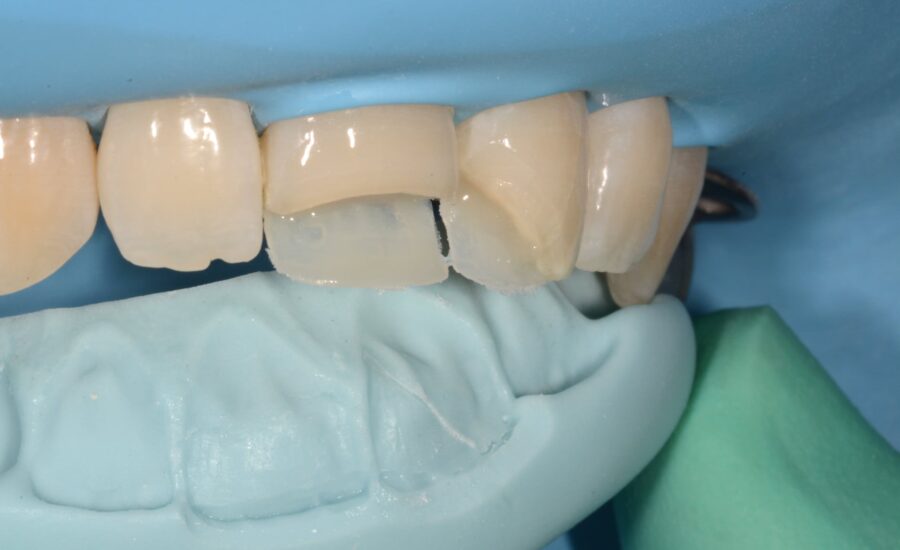
17: Incisors 11 and 21 after palatal shells built up.
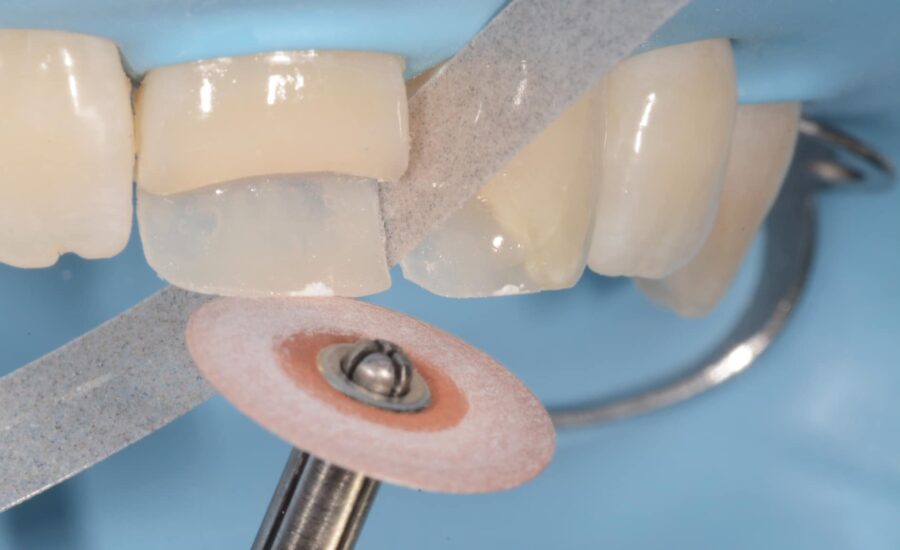
18: Dry shaping of the incisal and interproximal contours of the palatal walls using an abrasive disc and strip.
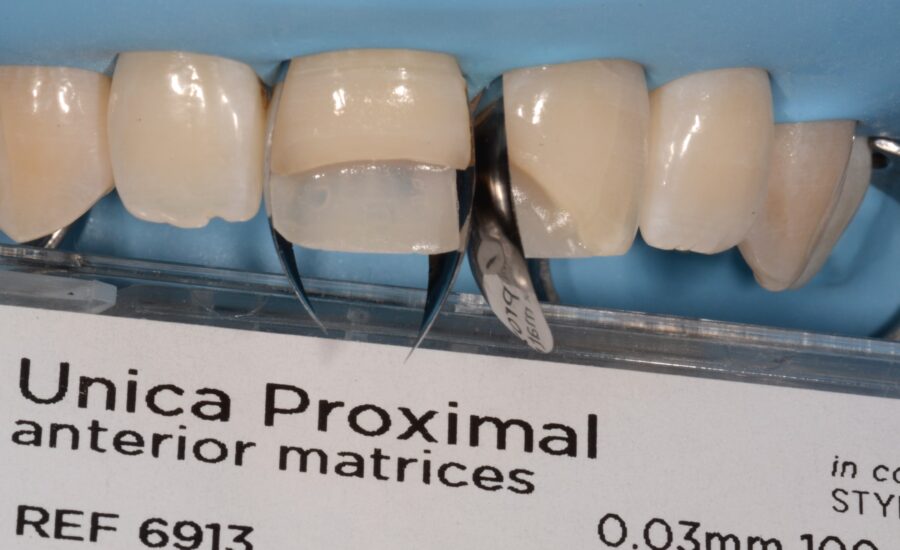
19: We decided to use Unica Proximal sectional matrices to restore the missing parts of incisors 11 and 21. Thanks to its shape, the Unica Proximal can be positioned and stabilized between the tooth and the papilla without the need for a wedge. Its curvature also allows for the easy restoration of the anterior teeth’s interproximal morphology.
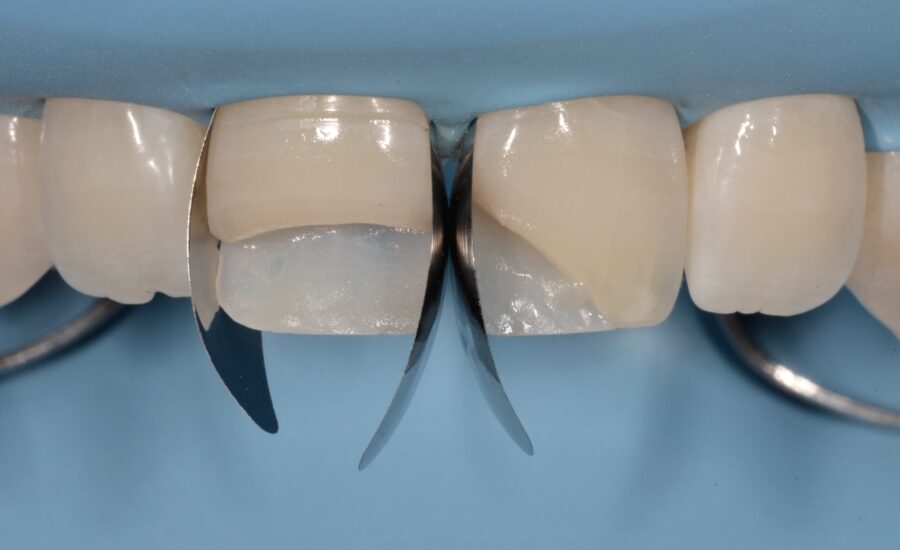
20: Frontal view of the incisors with Unica Proximal matrices in place; no wedge was used to stabilize the matrices.
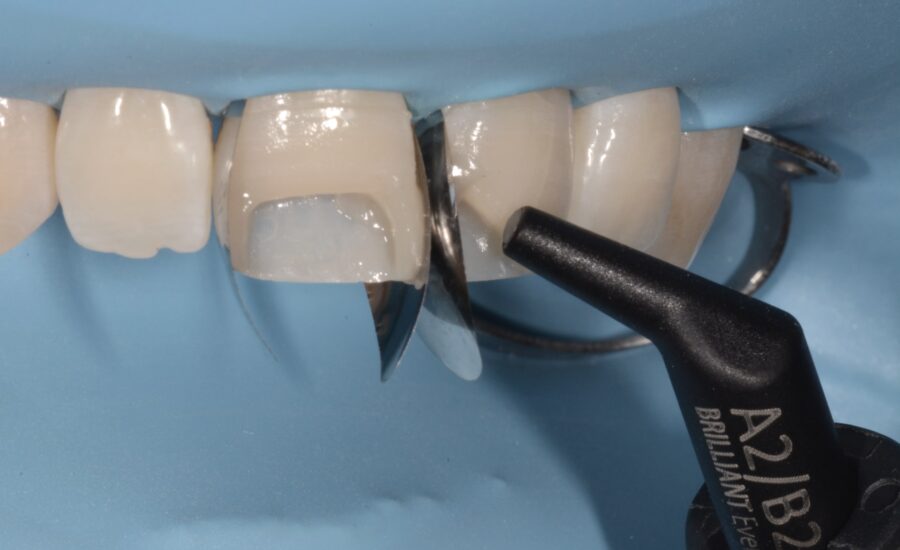
21: Build up of the interproximal walls.
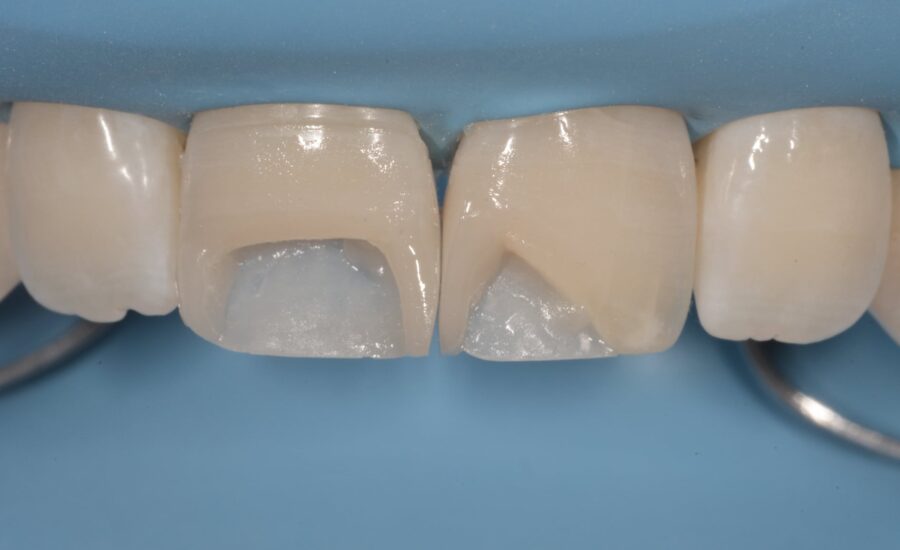
22: The situation after build up of the interproximal walls and matrix removal to achieve a better access to the cavities.
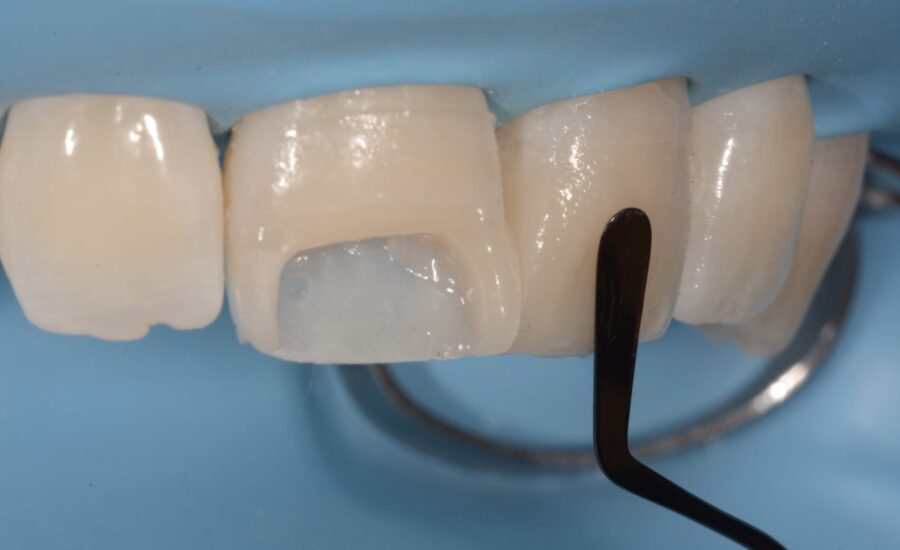
23: The labial surfaces were restored using A2B2 composite.
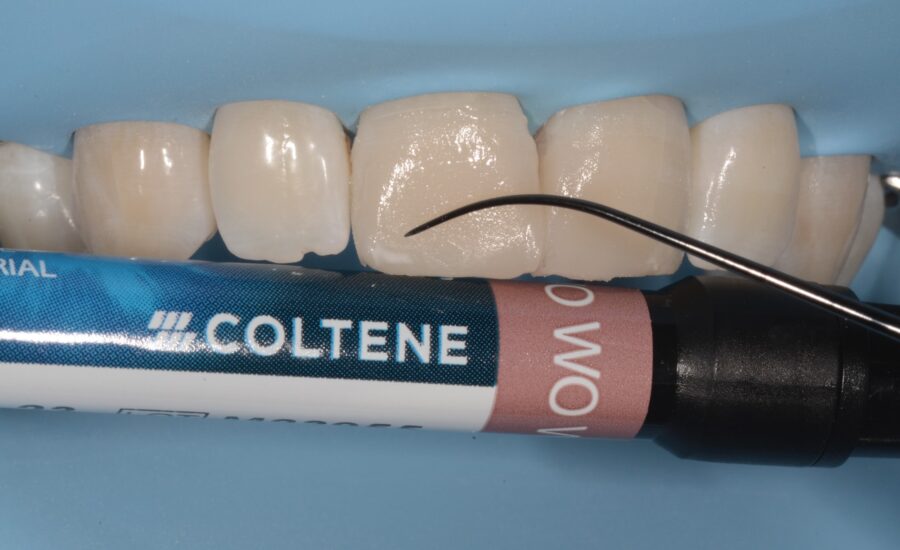
24: Clinical situation after labial surface build up and insertion of some stains to imitate the nature.
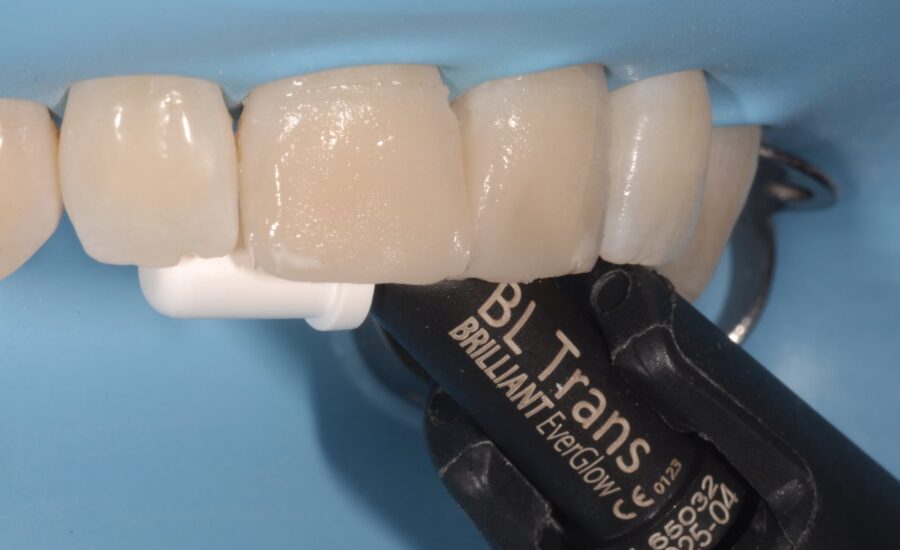
25: A thin layer of translucent, high-value enamel composite was used to enhance the depth effect of the restoration.
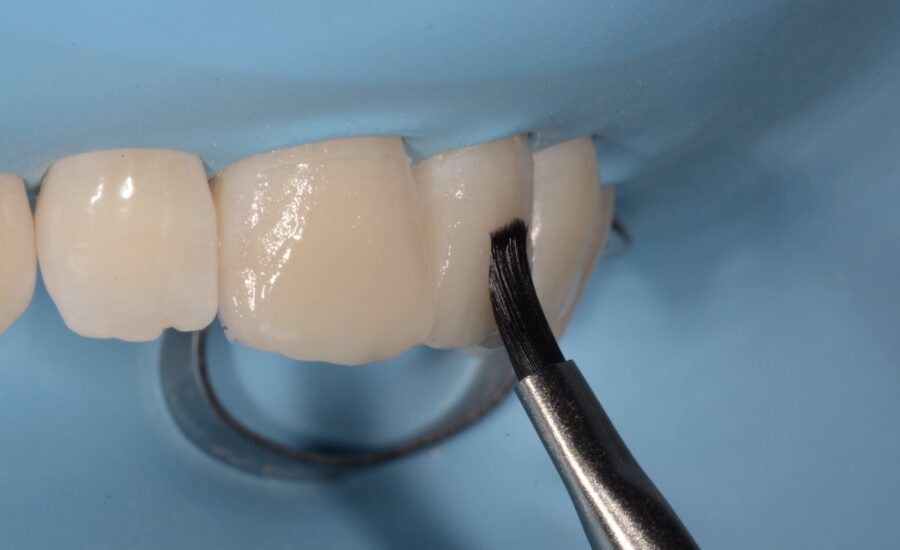
26: A brush was used to smooth out and remove any excess of composite before it was cured.
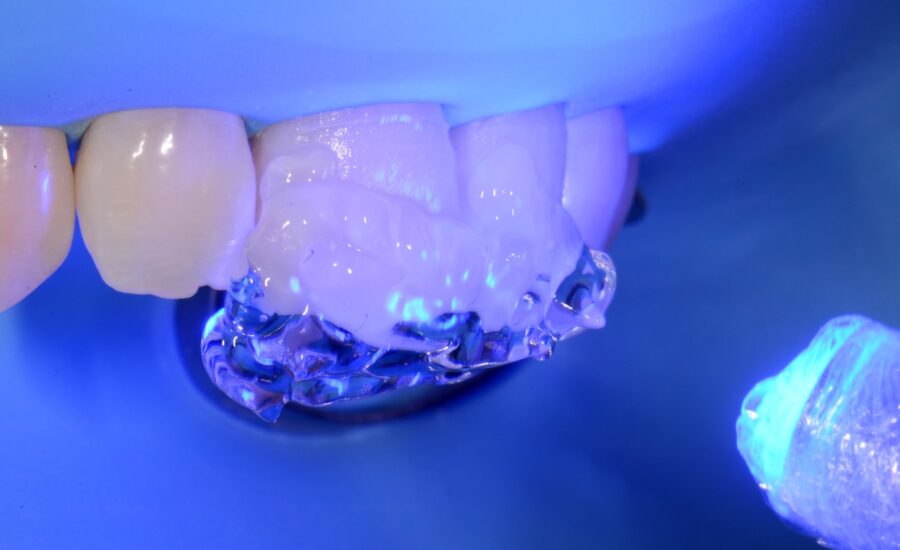
27: Light curing: after the final polymerization of all the composite, a second step was performed using ultrasound gel to avoid contact between the composite and oxygen, thus maximising the conversion of the composite.
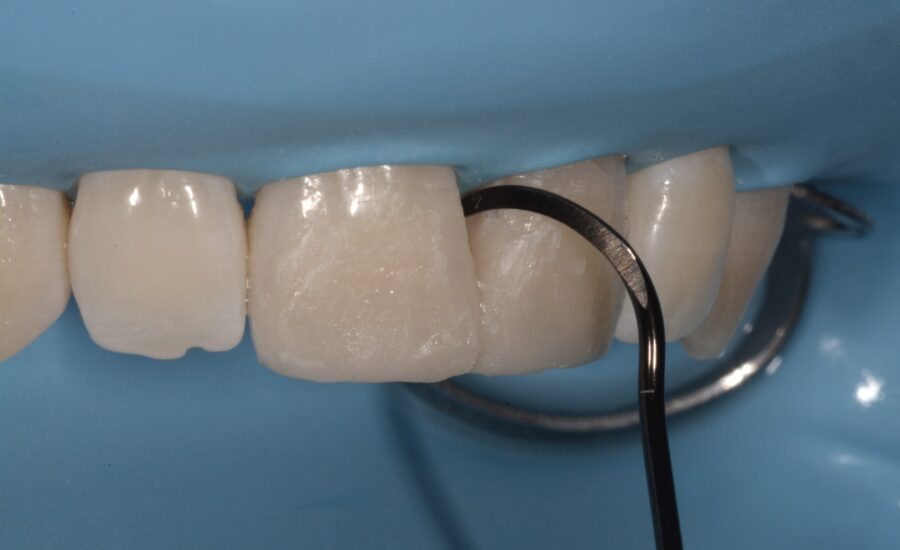
28: Removal of excess adhesive residue.
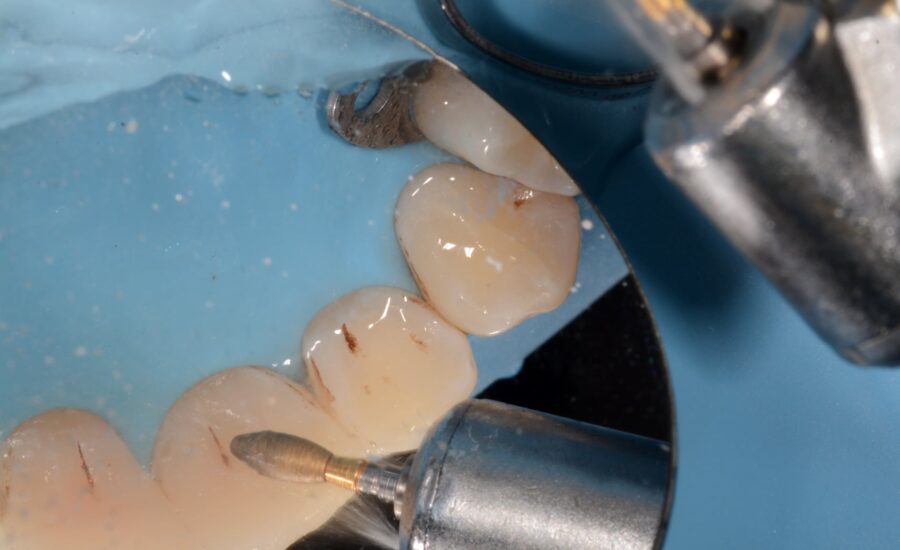
29: Finishing of the palatal surfaces.
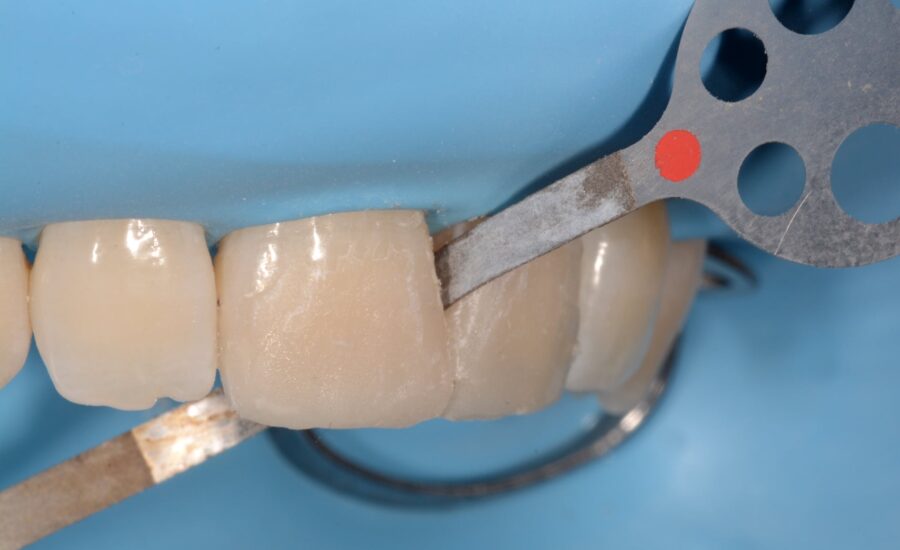
30: Finishing the interproximal anatomy looking for transition lines (1).
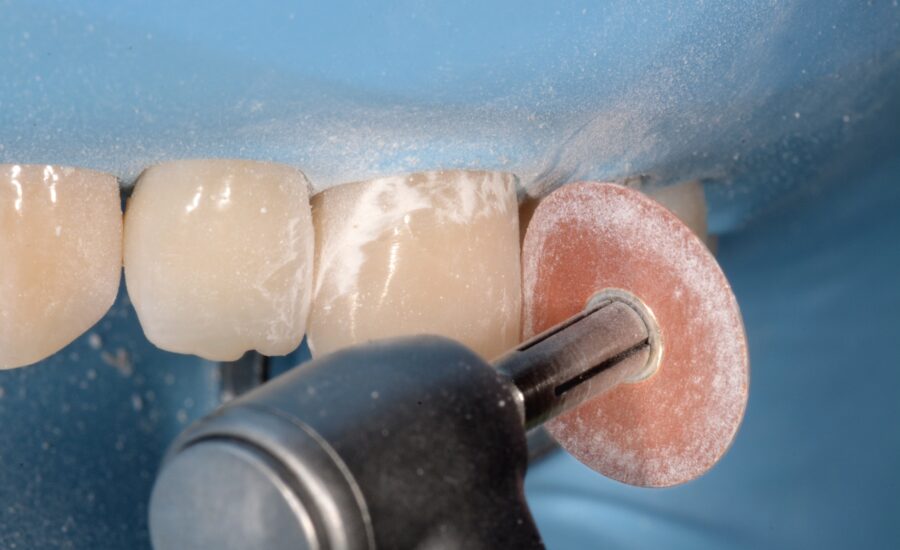
31: Finishing the interproximal anatomy looking for transition lines (2).
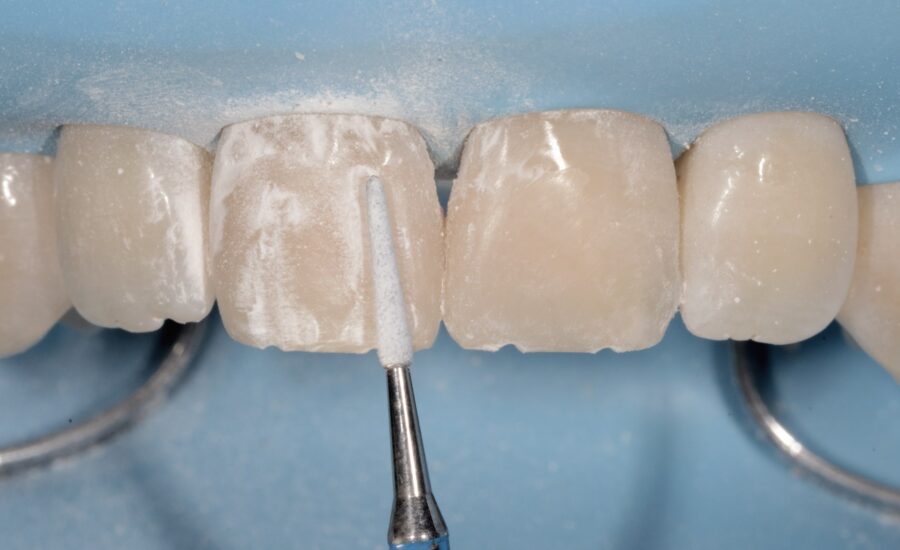
32: A drill was used to create grooves and mamelons.
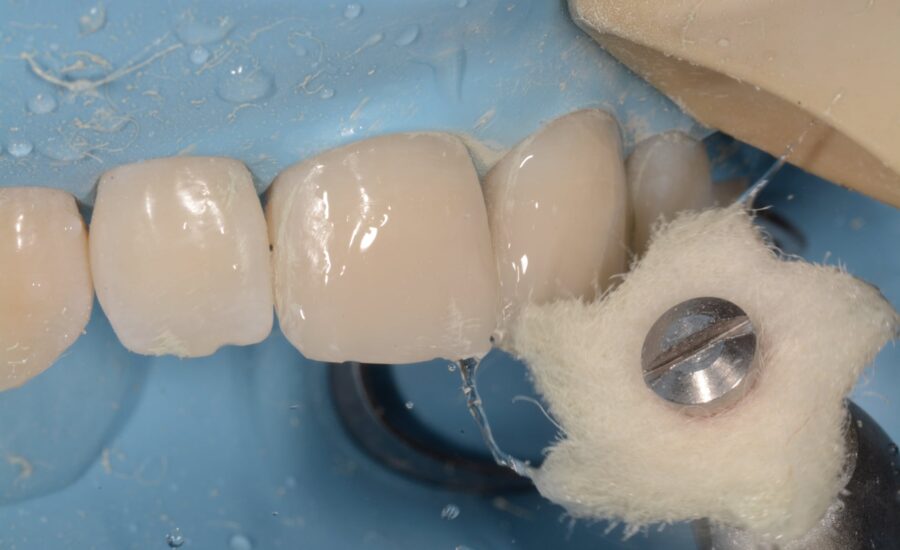
33: Polishing process.
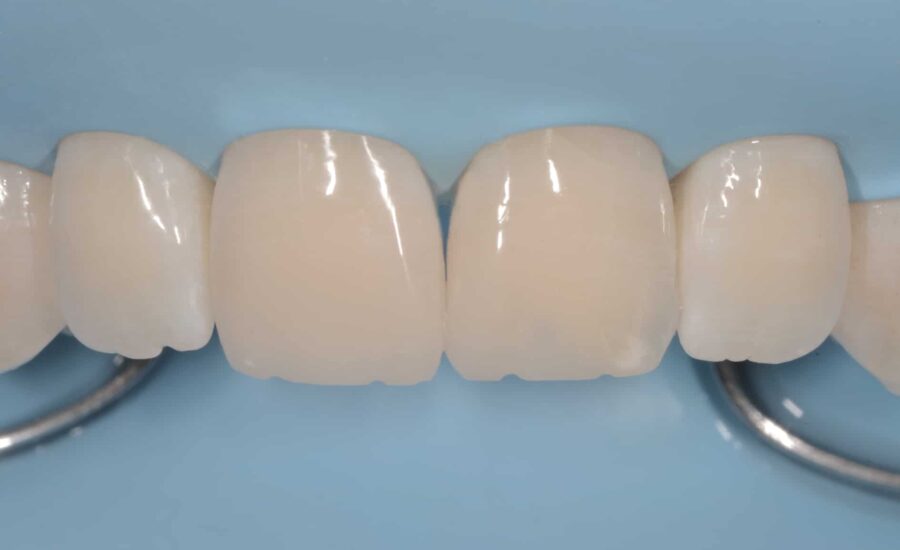
34: The restoration after polishing the labial surfaces.
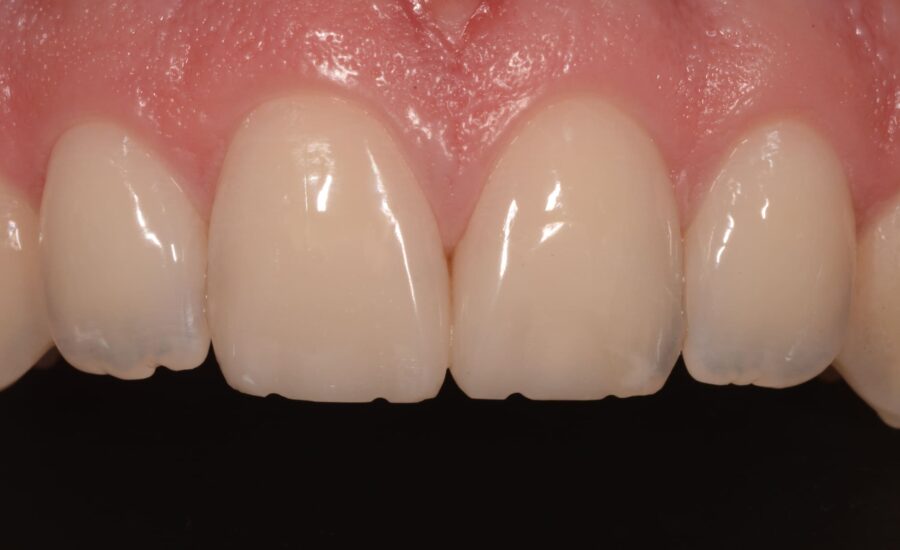
35: The final outcome, front view.
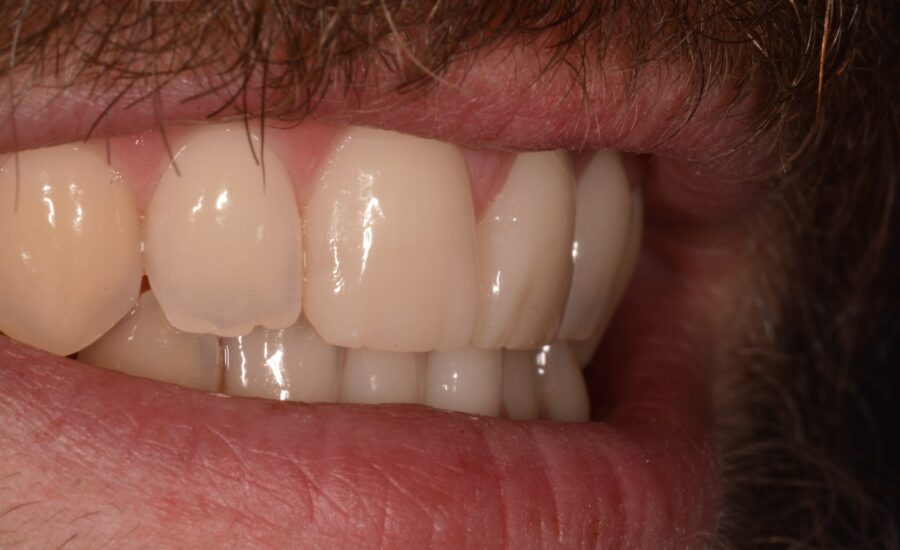
36: Lateral view of the final outcome.
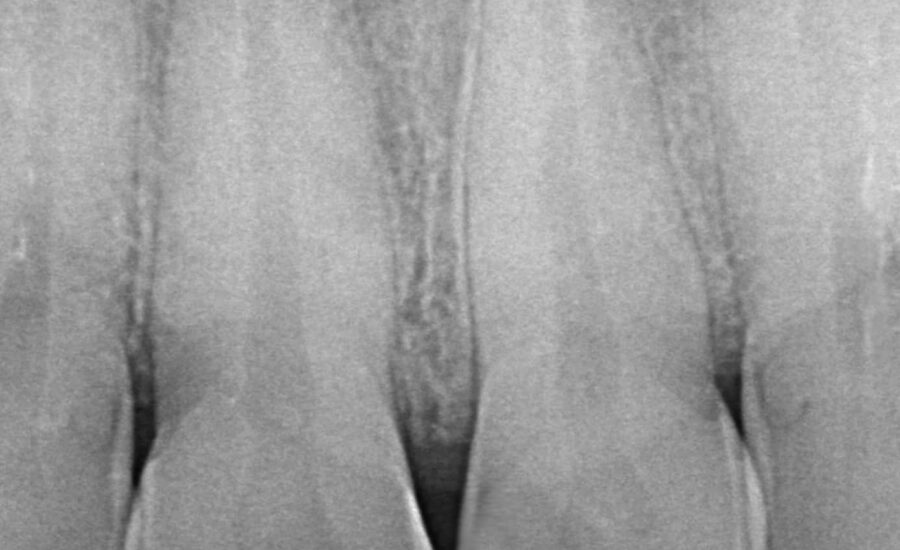
37: Final x-ray.
conclusion
Unica Proximal is a smart solution for everyday direct aesthetic and functional anterior restorations. It is particularly well-suited to class III and IV carious lesions.
In this case, we used the Polydentia Unica Proximal matrix to help build the interproximal walls when reconstructing the two fractured maxillary incisors, thereby restoring the function and aesthetics of the upper arch.
DOWNLOAD PDF
Dr_Saracinelli_Restoration-of-two-broken-incisors-Proximal
https://download.polydentia.ch/file/casi-clinici/en/mkt-0192-cc-en-Saracinelli-broken-incisors-Proximal.pdfproduct used
-
 This product has multiple variants. The options may be chosen on the product page
Unica Proximal anterior matrices
other clinical cases
-

Class II adjacent cavities on 1st and 2nd molars – QuickmatFIT anatomical sectional matrices & myRing Forte – Dr David Gerdolle
A 28-year-old female patient, without any systemic medical conditions presented with a carious lesion affecting both molar 46D and 47M. The following case illustrates the direct composite restoration of the lesion using the Polydentia QuickmatFIT anatomical sectional matrices in combination with myRing Forte and myWedge plastic v-shaped wedges....
-

Class II adjacent cavities on 1st and 2nd molars with myQuickmat Prime – Dr. Javier Tapia Guadix
The patient came to our practice for a routine check-up. An initial analysis revealed a class II carious lesion on 1st and 2nd molars. We decided to eliminate the carious lesions and proceed with a direct composite restoration of the cavities. The following case study shows the step-by-step restoration procedure using the Polydentia myQuickmat Prime sectional matrix system with integrated wedges. ...
-

Class II cavity direct composite restoration on a young permanent premolar – myClip 2.0 – Dr Marina Papachroni
For young patients rebuilding the anatomy in class II cavity restorations is a major issue but not making too many occlusal adjustments after finishing the layering procedures is one of the same importance aspects. The following images show the step-by-step treatment we performed for treating decay on the upper first premolar of a 15-year-old teenager. ...
-

Class II cavity direct restoration on young permanent molar with myQuickmat Forte – Dr Marina Papachroni
Class II (interproximal) decay involves the proximal surface of a posterior tooth and it is a common occurrence in many dental patients. One challenge for the clinician is to accurately recreate a physical contact to the adjacent tooth and, at the same time, to restore proper interproximal anatomic form. This case involves a teenager 16 years old with an interproximal lesion in his left lower molar (#36)....
-

Class II direct composite restoration on first premolar – QuickmatFLEX sectional matrices and myClip Junior – Dr Marina Papachroni
A male teenager came to our office feeling pain in the upper left quadrant. We proceeded with a Class II restoration of the first premolar without removing brackets. The following images show the step-by-step direct composite restoration procedure using the premolar sectional matrix QuickmatFLEX in combination with the paediatric sectional matrix ring myClip junior. ...
-

Class II restoration of a primary molar – myRing Junior – Dr Sabová
The young patient came for a periodic checkup. After a preliminary analysis we found a class II mesial carious lesion on primary molar 6.5. Since the dimensions of the carious lesion were limited, we decided to proceed with a direct composite restoration procedure using myJunior kit from Polydentia. ...
-

Class II restoration on 1st molars with myQuickmat Prime – Dr. Javier Tapia Guadix
The patient came to our attention for a periodic control; preliminary analysis evidenced a secondary caries on molar #46 due to leakage of an old composite restoration. The following case study shows the step-by-step replacement procedure of the old restoration using the Polydentia myQuickmat Prime sectional matrix system with integrated wedges. ...
-

Class II restoration on a first molar – QuickmatFIT anatomical sectional matrices and myRing Forte – Dr Cristian Scognamiglio e Dr Alessandro Perucchi
The patient came for a consultation complaining of discomfort at tooth 36 when chewing. Molar 36 presented a very old composite restoration with initial disto-occlusal infiltration. We decided to carry out an OD restoration that also involved the buccal surface in order to replace the filling with a new aesthetic restoration. In this clinical case, we illustrate the procedure for the step-by-step restoration of tooth 36 using the Polydentia QuickmatFIT Molar sectional matrix in combination with the myQuickmat Forte sectional matrix ring....
-

Class II restoration on second bicuspid – myQuickmat Forte kit – Dr. Chiodera
The Polydentia myQuickmat Forte kit is a very effective system for posterior class II restorations....
-

Class II restoration with mytines GO – Dr. Nicolò
The patient visited the dental practice complaining of discomfort in tooth 46. Following an in-depth analysis, a large carious lesion was found on tooth 46, as well as another on premolar 45.This case study demonstrates the step-by-step procedure for direct restoration using myRing Forte in combination with myTines GO, Lumicontrast sectional matrices, and wooden wedges. ...