26 Mai Dr. Hagner – Application in Periodontics – F-Splint-Aid Slim
Application in Periodontics – F-Splint-Aid Slim
by Martin Hagner

Martin Hagner
Dr. Hagner graduated from the Dental Faculty of Bonn in 2003. Since 2010, he has achieved many post graduations in Periodontics and Implantology. From 2007 to 2010 he has been Researcher at the Polyclinic for periodontics, dentistry and preventive dentistry at the University of Bonn. Since 2011 Dr. Hagner has a practice in Germany dedicated to comprehensive dentistry. Beside his practice activities, he is a frequent speaker and lecturer in seminars and congresses. Dr.Hagner is also very active as author or co-author of scientific national and international publications.

Fallstudie
Tooth-splinting procedure is demonstrated on tooth 26 which was root amputated during resective surgical therapy in a patient with generalised severe chronic periodontitis and type II diabetes.
The first x-ray of the teeth shows the situation after anti-infective therapy and prior to endodontic treatment. The diagnosis was primary periodontal lesion with secondary endodontic involvement, with furcation defect degree III, which could be probed distally and vestibulary.
The second x-ray of the teeth shows the x-ray examination under a rubber dam during the endodontic treatment of tooth 26.
The third x-ray shows tooth 26 with the completed filling of the mesiovestibular and palatinal root canal. The distovestibular root canal contains a medicinal insert in form of calcium hydroxide. The pulp chamber and the upper part of the root canal are filled with a composite material, which also forms the cover filling.
The fourth x-ray image shows tooth 26 after root resection of the distal and palatinal root. During surgery it was displayed that the grade III furcation continued through the mesiopalatinal area. The palatinal root could no longer be preserved.
The fifth x-ray image shows tooth 26 splinted with F-Splint-Aid Slim at teeth 25 and 27.
This case study shows the tooth splint procedure with the F-Splint-Aid Slim System, using the direct adhesive technique.

1a: X-Ray images 1-3 (from left to right).
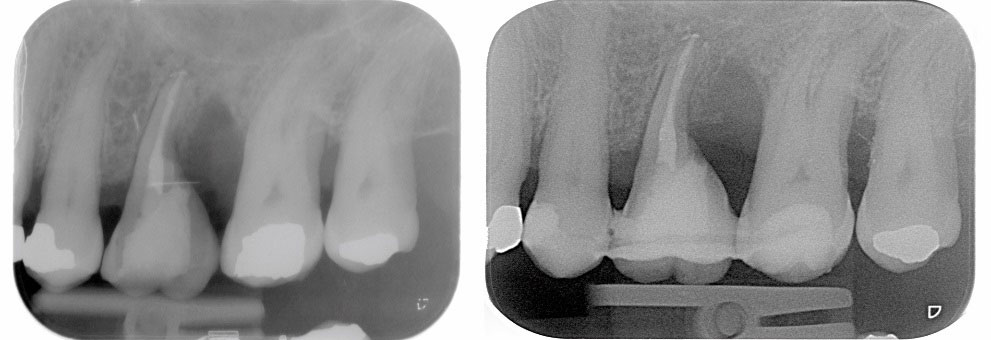
1b: X-Ray images 4-5 (from left to right).
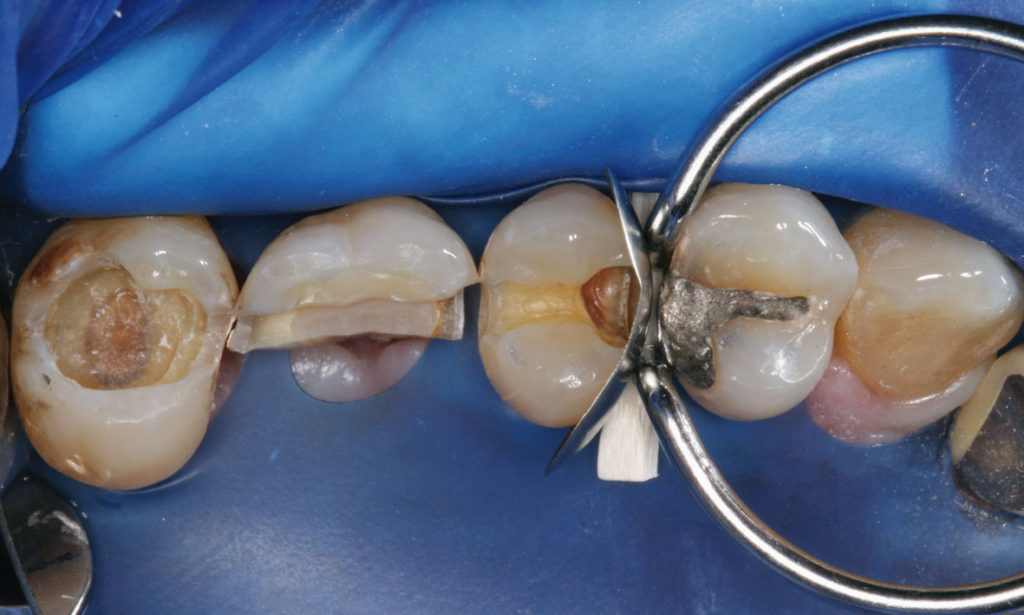
2: Excavated situation of teeth 25-27 under rubber dam, with sectional matrix applied mesialy at tooth 25.
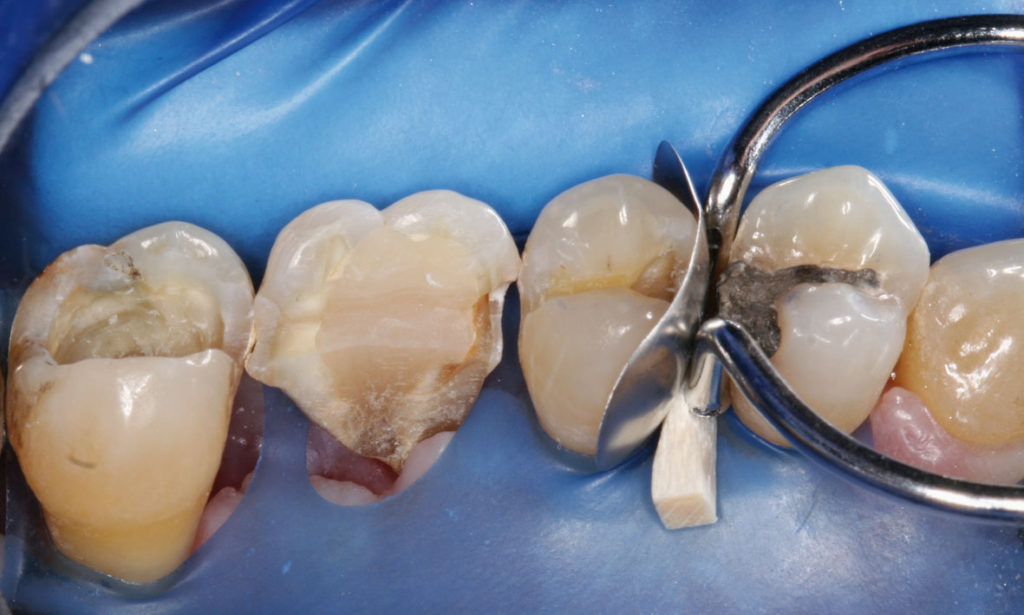
3: Palatinal view of the excavated situation of teeth 25-27.
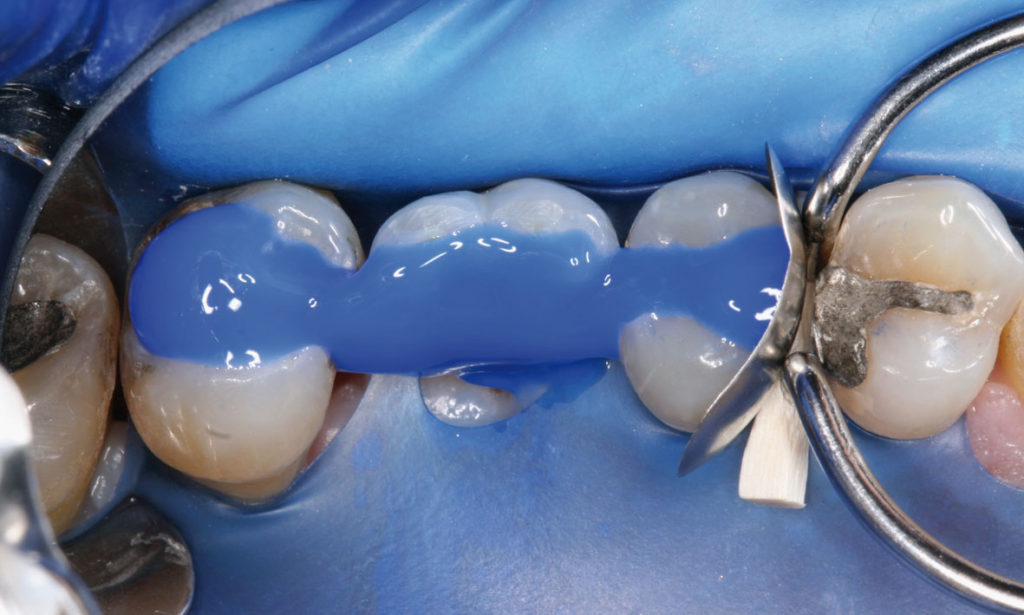
4: Total etch procedure of the excavated situation with blue etch gel.
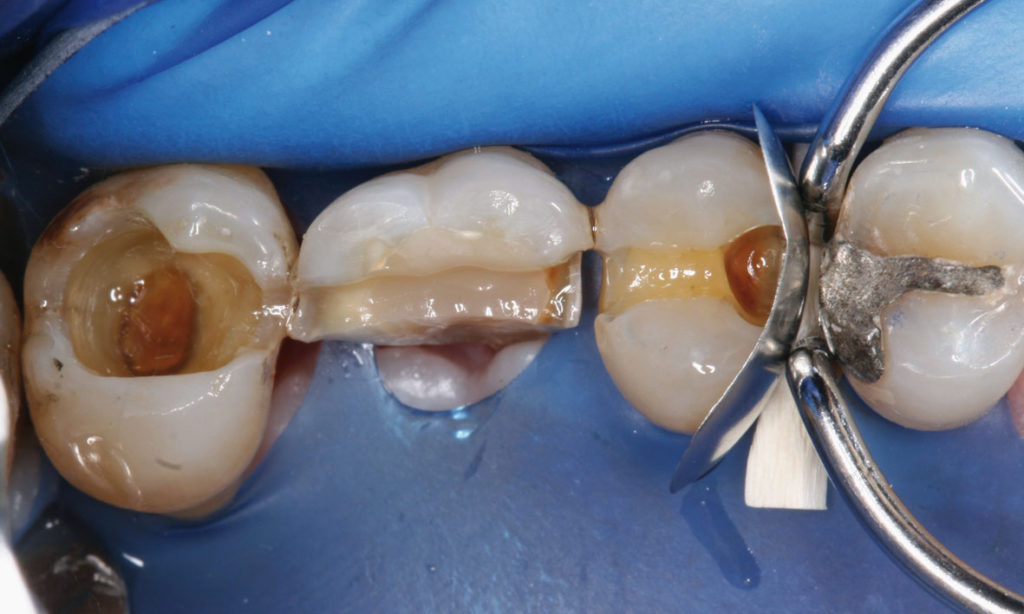
5: Conditioned cavities of teeth 25-27 with bonding.
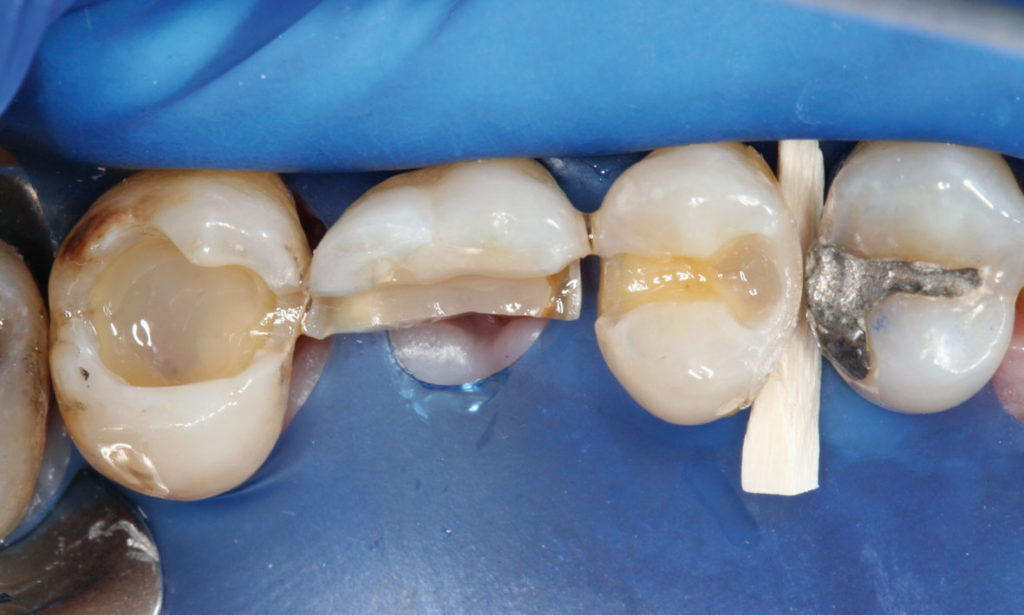
6. Built-up mesial ridge of tooth 25 after removal of the sectional matrix as well as underfilling with flow composite at tooth 27.
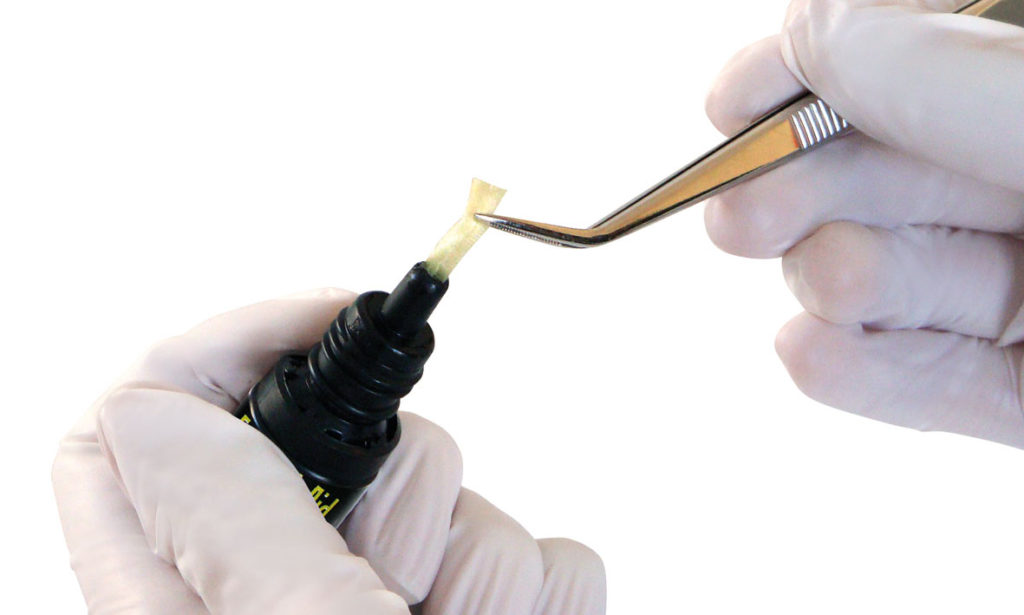
7. F-Splint-Aid Slim strip is pulled out from the light-protected storage bottle using tweezers.
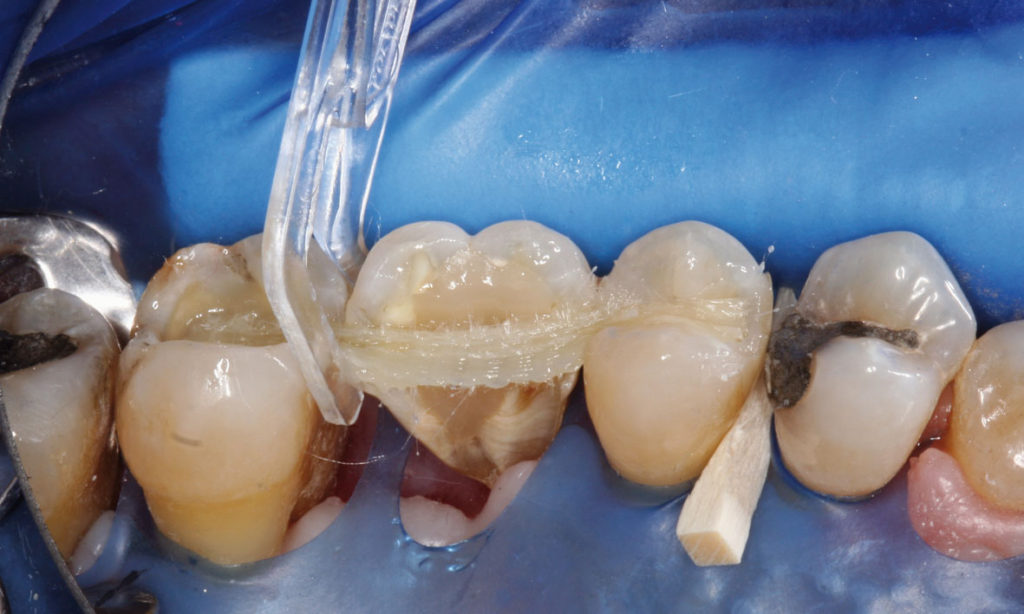
8. Length-adaptable fiberglass ribbon F-Splint-Aid Slim with application clasp between teeth 26 and 27.
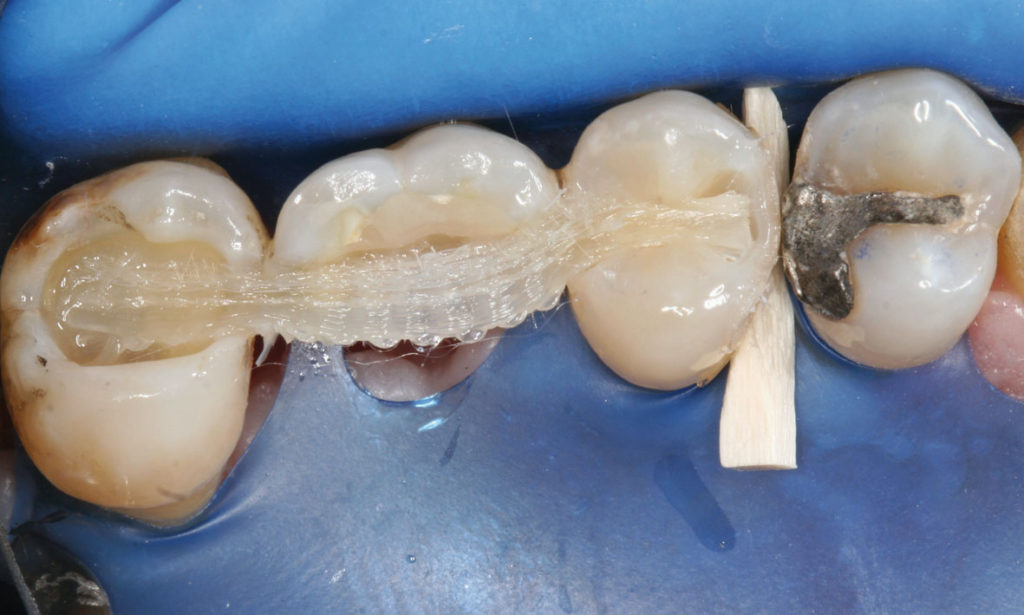
9. F-Splint-Aid Slim fiberglass ribbon is fixed with flow-composite in cavities of teeth 25-27.
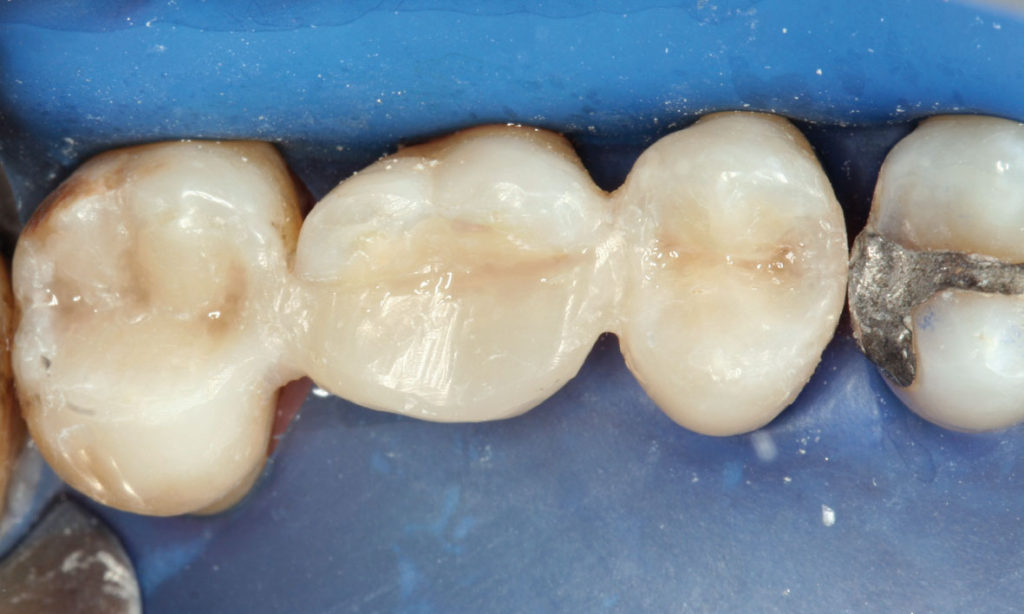
10. Completed composite restoration of teeth 25-27 with integrated fiberglass splinting.
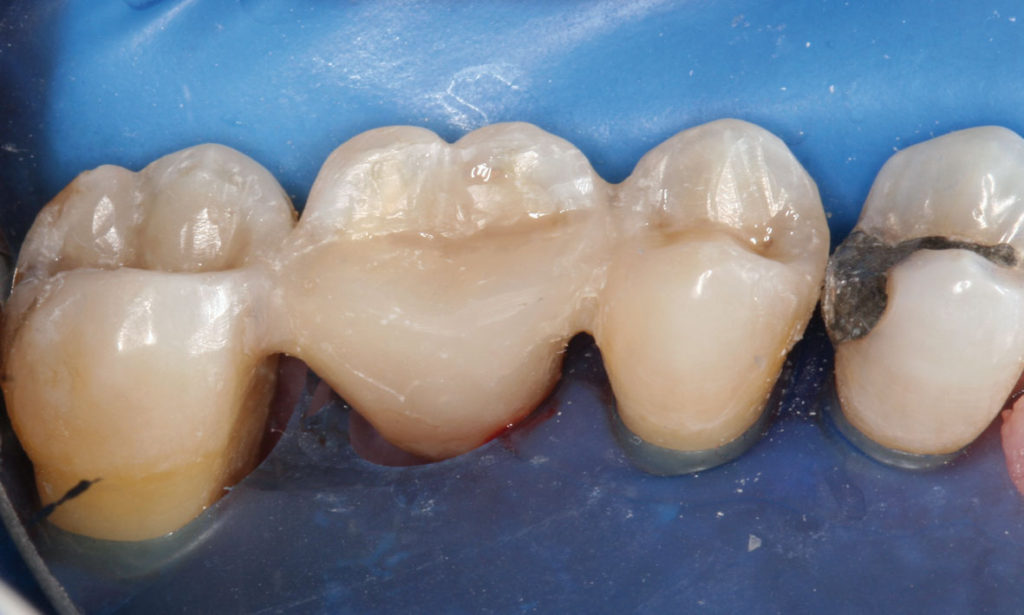
11. Palatinal view of the restored teeth after splinting with F-Splint-Aid Slim
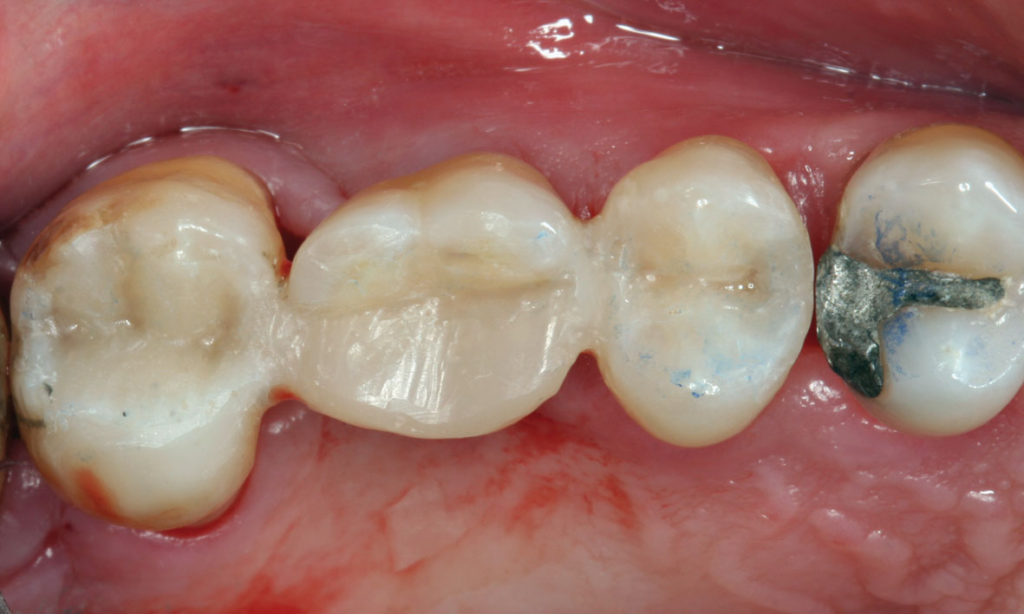
12. Occlusal view of the tooth splinting after removal of the rubber dam.
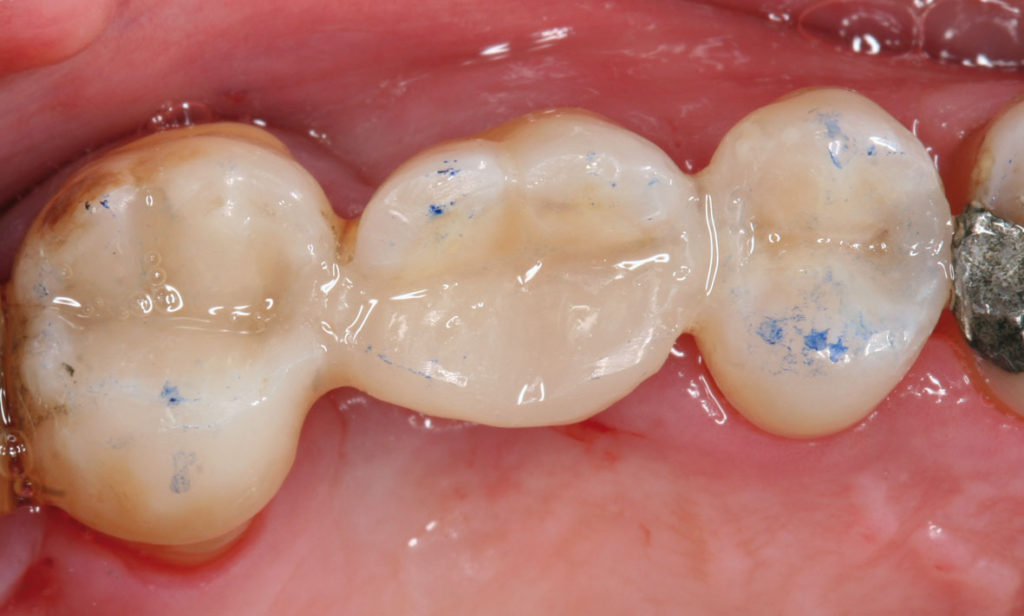
13. Contact points of the restored teeth marked by blue paper. Tooth 26 with reduced numbers of roots was designed with a reduced orovestibulary width with subsequent static contact on the buccal triangular tubers to prevent shearing forces.
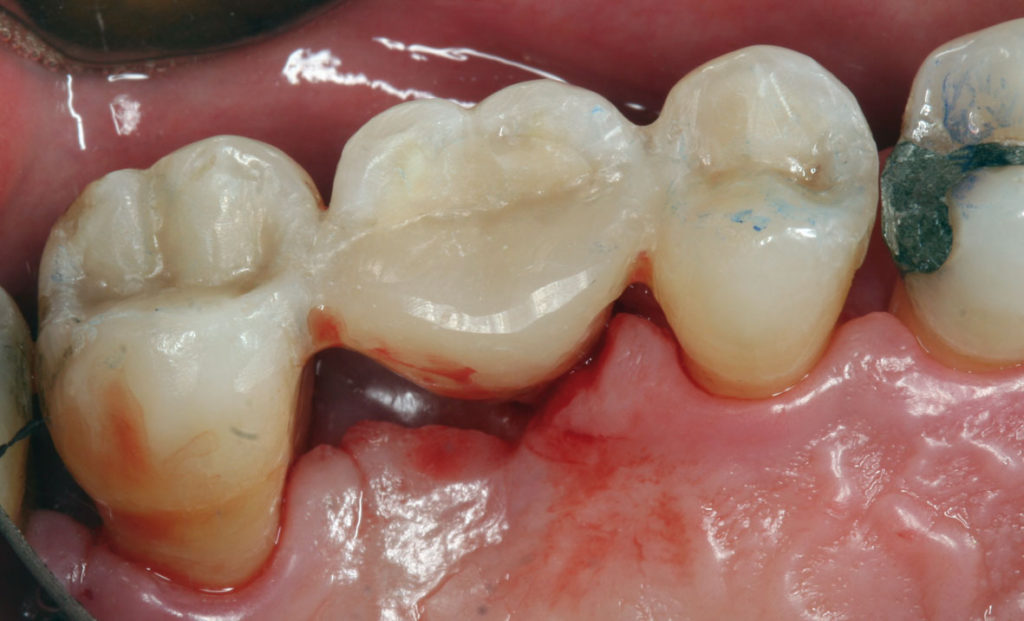
14. Palatinal view of the completed restorations.
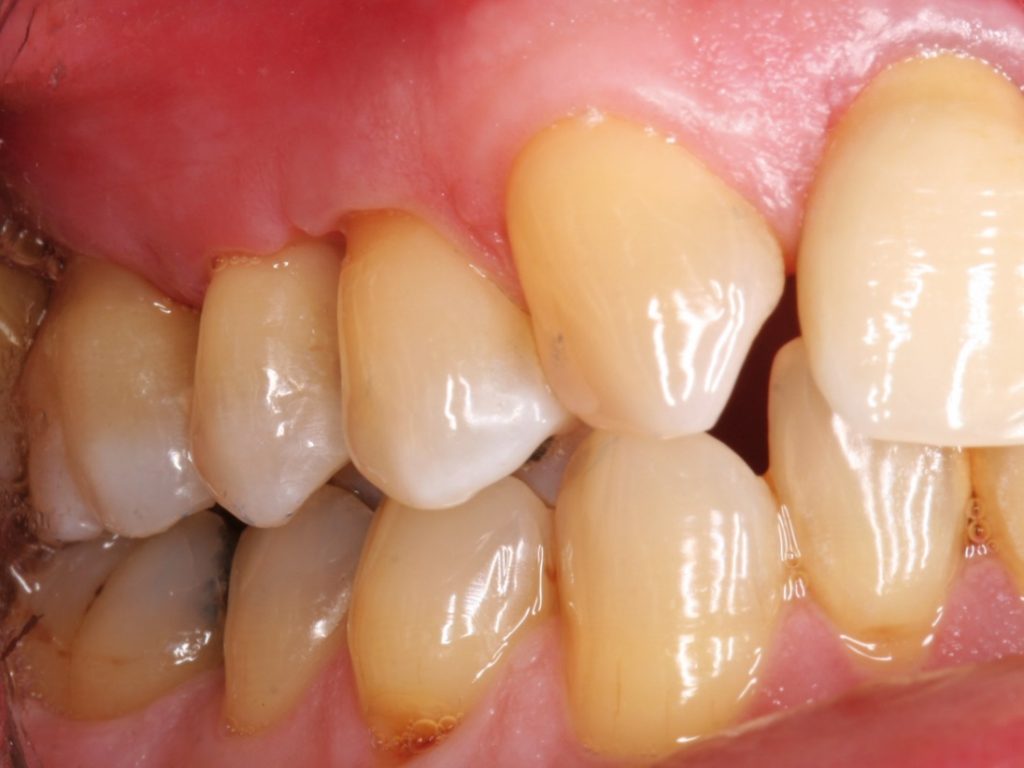
15: Buccal view after tooth splinting in intercuspidation.
Schlussfolgerungen
From my point of view, the biggest advantage of F-Splint-Aid Slim is the stable, woven structure of the splint material, as well as its practical light-proof packaging. Another advantage is offered by the included „Clip&Splint“ autoclavable plastic application clips for fixing the splint materials to the teeth.
andere klinische Fälle
-
Austausch einer alten Amalgam – Füllung und Restauration einer Klasse II Kavität – myRing Forte mit myTines Large & myTines Small – Dr. Giuseppe Chiodera
Der Patient stellte sich aufgrund einer alten Amalgam - Füllung vor. Die häufigsten Probleme beim dem Entfernen von alten Metallfüllungen sind Risse, welche an der Zahnstruktur und insbesondere an der Krone auftreten können....
-
Diamond24, 24 Lösungen für Ihre Klasse II Restaurationen
Diamond24 und myRing Classico: 24 Lösungen für Ihre Klasse II Restaurationen. Lesen Sie den Artikel (in Englisch) von Dr. Chiodera, der erklärt, wie Sie gute Kontaktpunkte mit Diamond24 und myRing Classico bei Klasse II Restaurationen erhalten....
-
Direkt Restauration einer Klasse-II-Kavität an einem ersten Prämolaren – QuickmatFLEX sectional matrices e myClip Junior – Dr Marina Papachroni
Ein Jugendlicher stellte sich in unserer Praxis vor und klagte über Schmerzen im oberen linken Quadranten. Wir führten eine Klasse-II-Restauration beim ersten Prämolaren durch, ohne die Brackets zu entfernen. Auf den nachfolgenden Fotos ist das schrittweise Verfahren der direkten Kompositrestauration unter Verwendung der Teilmatrize QuickmatFLEX für den Prämolaren in Kombination mit dem pädiatrischen Teilmatrizenring myClip Junior dargestellt. ...
-
Direkte Kompositrestauration einer Klasse-II-Kavität bei einem jungen, bleibenden Prämolaren – myClip 2.0 – Dr Marina Papachroni
Bei jungen Patienten ist die Nachbildung der Anatomie bei Restaurationen von Klasse-II-Kavitäten von entscheidender Bedeutung, doch ein ebenso wichtiger Aspekt besteht darin, nicht zu viele okklusale Anpassungen nach Abschluss der Schichtverfahren vorzunehmen. Die folgenden Bilder zeigen die Schritt-für-Schritt-Behandlung, die wir zur Kariesbehandlung am ersten Oberkiefer-Prämolaren eines 15-jährigen Teenagers durchgeführt haben....
-
Direkte Restauration einer Klasse-II-Kavität bei einem jungen, bleibenden Molaren – myQuickmat Forte – Dr Marina Papachroni
(Approximal-)Karies der Klasse II betrifft die proximale Fläche von Seitenzähnen und kommt bei vielen Zahnarztpatienten häufig vor. Für den Behandler besteht eine Herausforderung darin, den physischen Kontakt zum Nachbarzahn exakt nachzubilden und gleichzeitig die richtige anatomische Approximalform wiederherzustellen. In diesem Fall geht es um einen 16-jährigen Teenager mit einer approximalen Läsion im linken Unterkiefer-Molaren (Zahn 36)....
-
Dr. Chiodera – Class III restoration with Unica anterior
The following case study shows the step-by-step restoration procedure using Polydentia Unica anterior matrix....
-
Dr. Chiodera – Klasse-II-Restauration am zweiten Bicuspidatus – myQuickmat Forte kit
Das Polydentia myQuickmat Forte Kit ist ein äußerst effektives System für Klasse-II-Restaurationen im Seitenzahnbereich....
-
Dr. Chiodera – MOD-Restauration des ersten Molaren – myQuickmat Classico kit
Das Polydentia myQuickmat Classico Kit ist ein äußerst effektives System für Klasse-II-Restaurationen im Seitenzahnbereich....
-
Dr. Fernández – Formmodifikation – Unica anterior
Ein junges Mädchen mit zwei Keramikverblendungen auf 12 und 22 kam zu uns, um ihre Ästhetik zu verbessern. Wir haben vorgeschlagen, die Verblendungen durch neue Kompositverblendungen zu ersetzen. ...
-
Dr. Gerdolle – Klasse II mesial, distal und MOD – MyClip 2.0 + LumiContrast
Nachfolgend wird die direkte Kompositrestauration zur Behandlung der Läsionen unter Verwendung von Polydentia myClip 2.0 Teilmatrizenring, LumiContrast Teilmatrizen und Holzkeilen erläutert....

